Ganesh chaturthi For the past two years, we have been observing with great enthusiasm. Sending warm wishes on Ganesh Puja. May Ganesha shower you with happiness and peace 🙏🏻🙏🏻
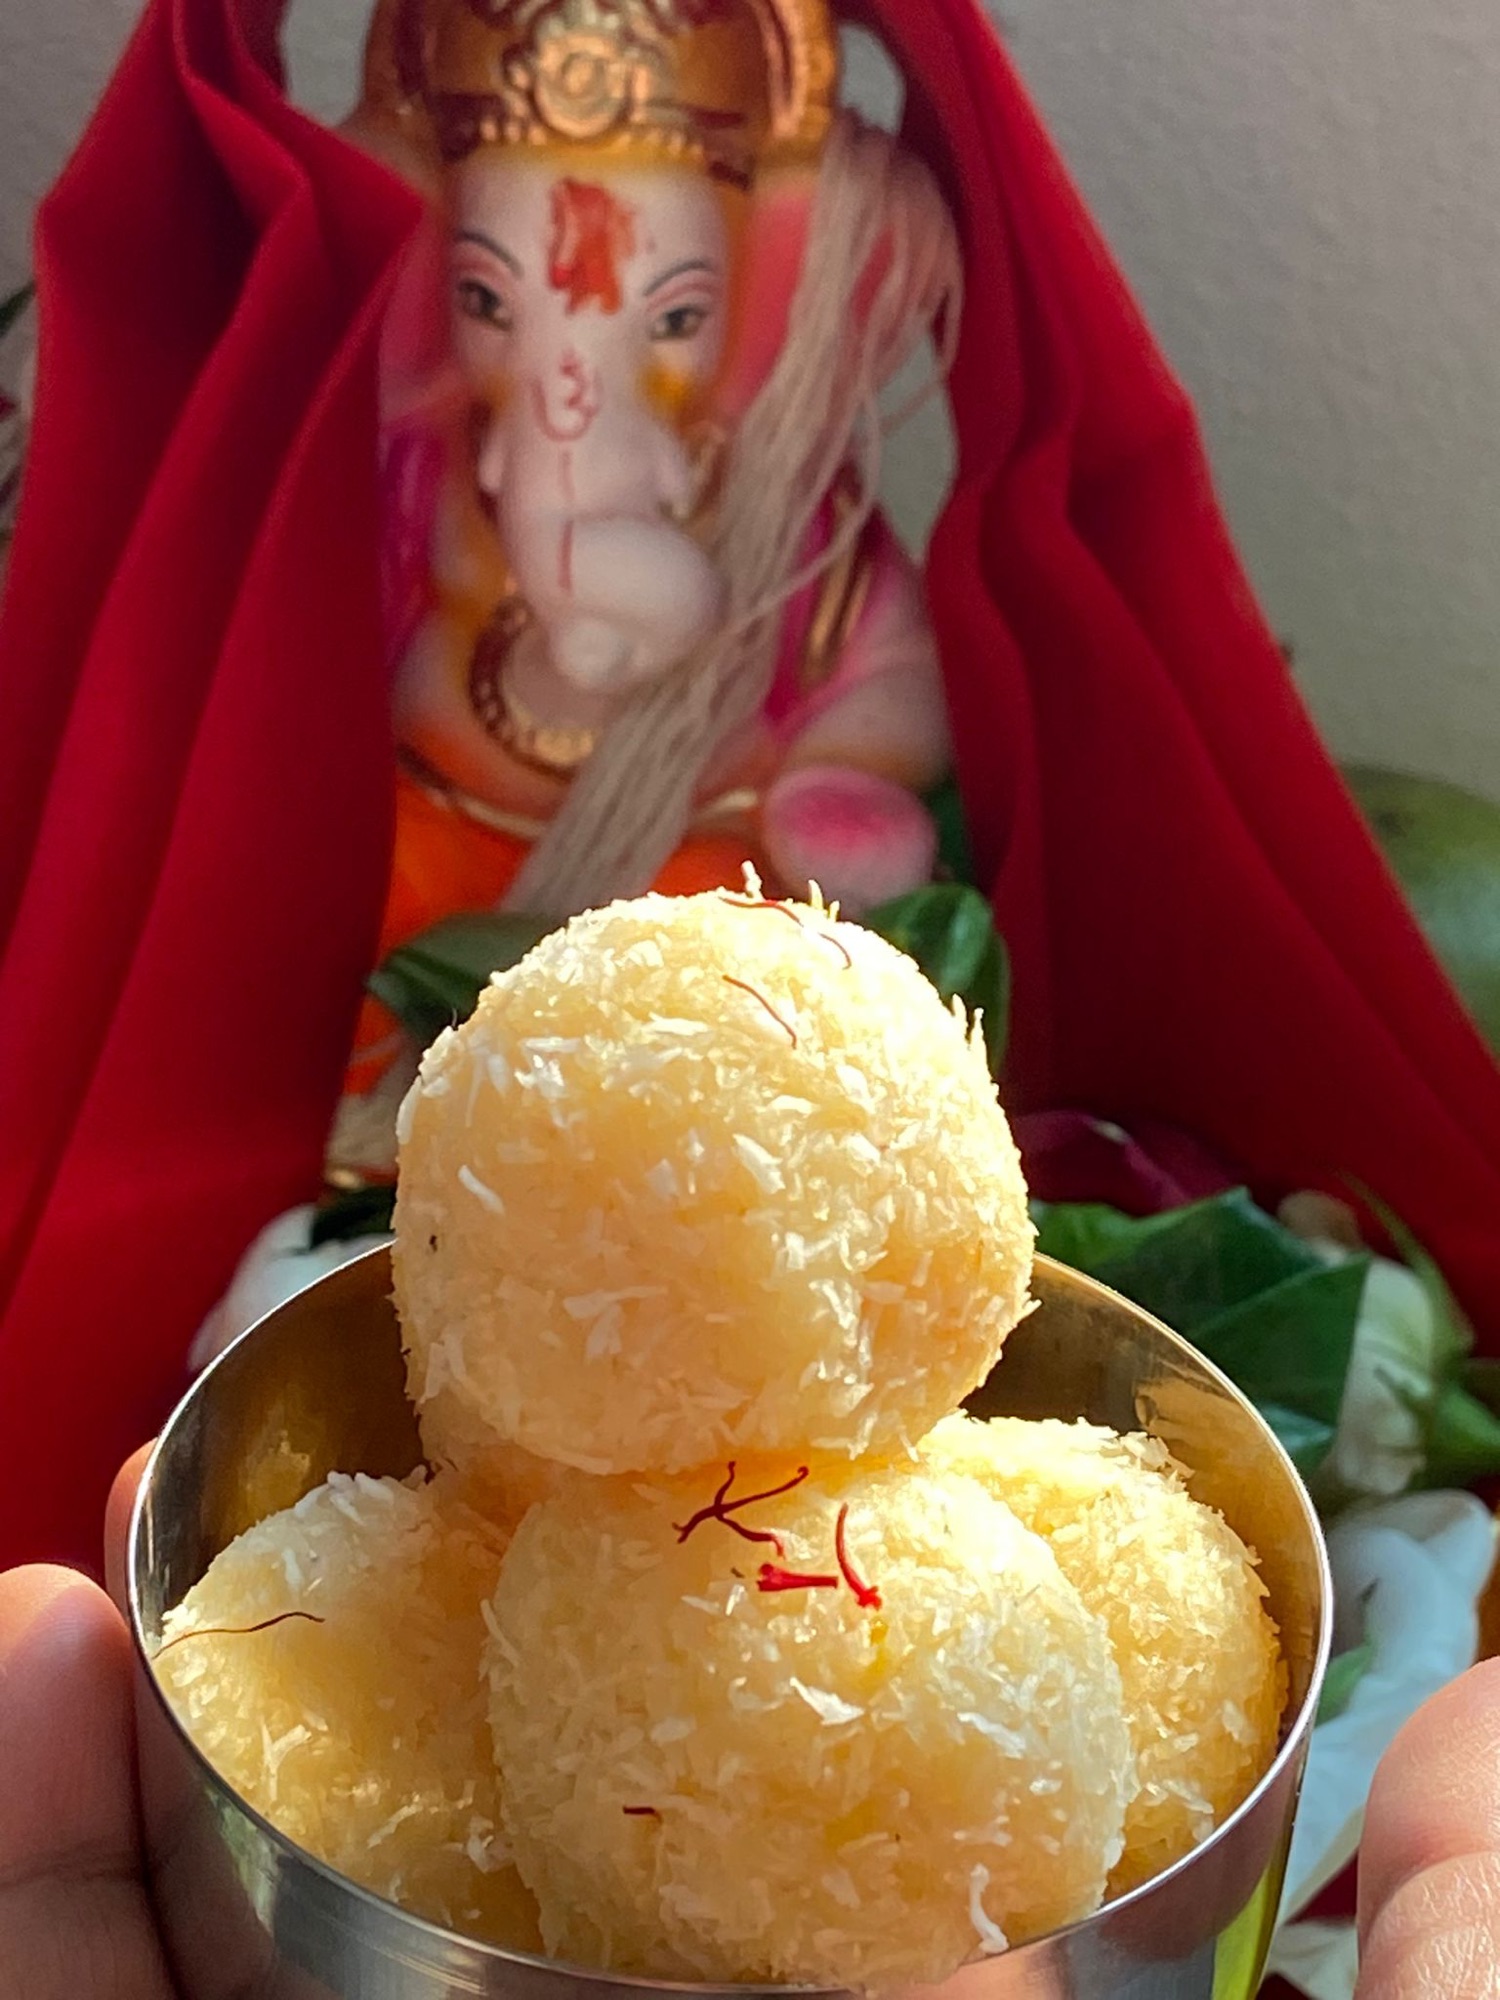
This year, I prepared Kesar Elaichi flavor Coconut Laddoo as an offering to Lord Ganesha.🎉
Laddoo, a traditional Indian sweet, is typically prepared to commemorate festivals and special occasions. Its preparation involves combining desiccated coconut with condensed milk to form desired shape, and fresh grated coconut can also be used as a substitute.
Additional information on various types of laddoo can be found on my blog.
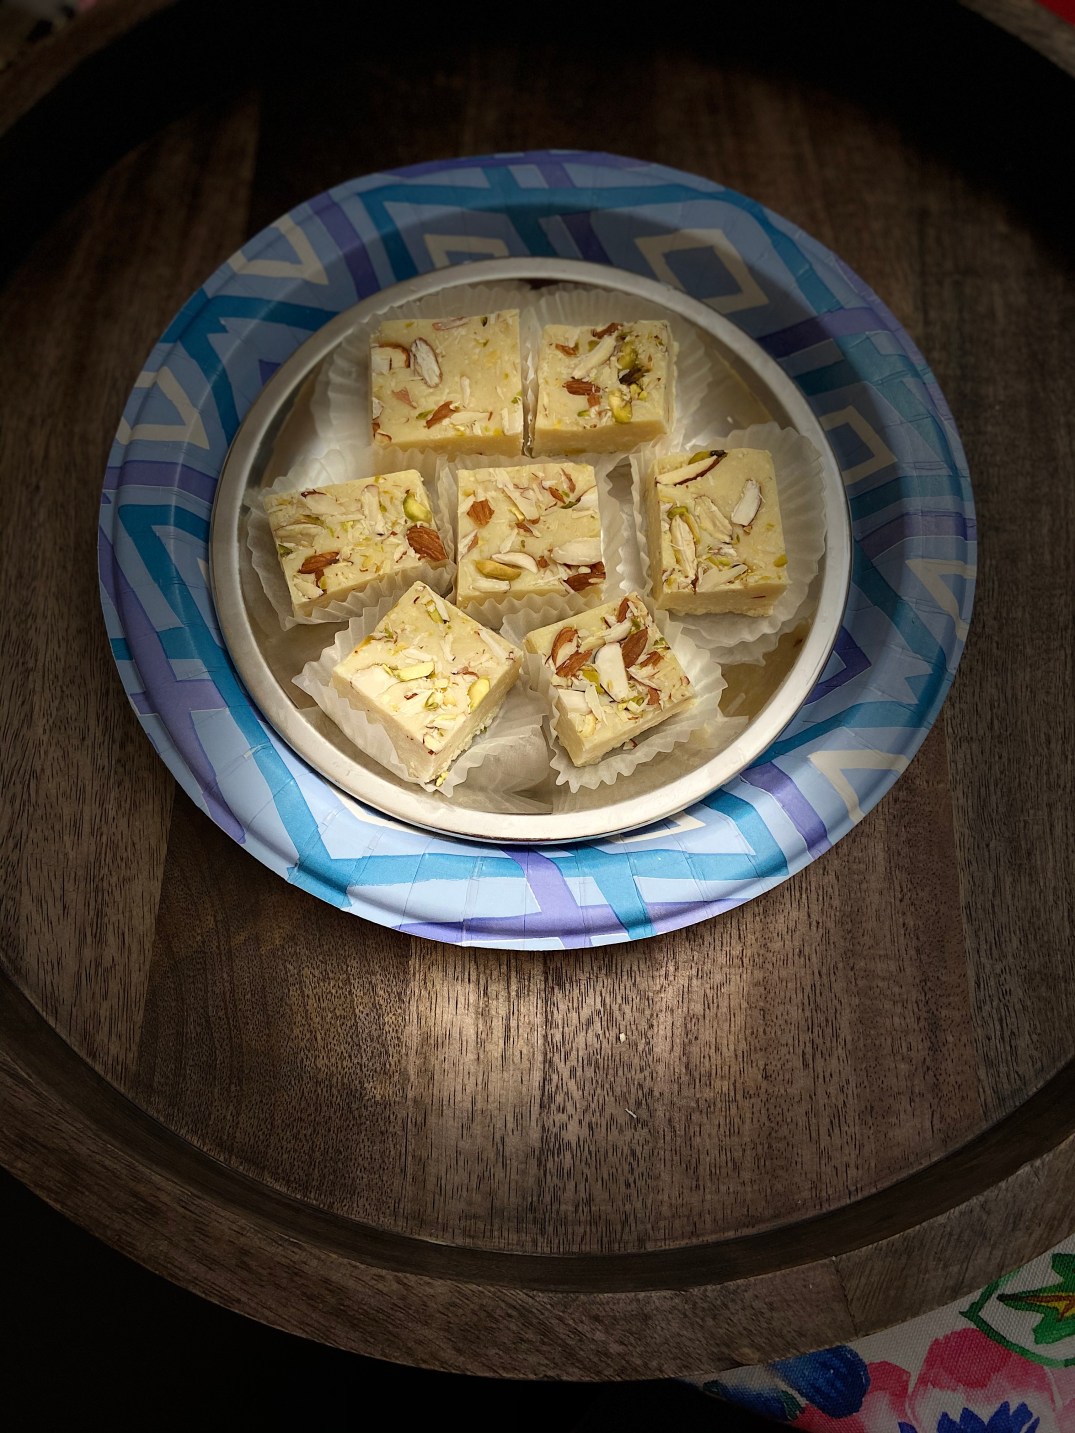
It’s a simple and easy burfi recipe or milk powder fudge recipe prepared with just 4 ingredients including milk powder, milk, ghee and sugar. It’s an ideal indian sweet recipe perfect for every indian festivals which can be prepared without much hassle and no complicated steps to follow.i prepared this to offer goddess Durga as Bhog on this pious occasion of Navratri.
Original recipe of famous blogger hebbarskitchen which i adapted and Tweaked so here i am sharing my version of Burfi which i flavored with Saffron and Screw pine essence (kwera water)
Craving more? Subscribe to desiswadbyaayushi to get new recipes and a weekly newsletter delivered straight to your inbox! And stay in touch on Facebook, Twitter, Pinterest and Instagram for all of the latest updates.
Method
Heat a non stick pan ,firstly, add in ghee and milk.keeping the flame on low,add milk powder and sugar or add more sugar if required or you like more sweetness.
mix well making sure everything is combined well.stir continuously keeping the flame on low and no lumps formed.also stir till the sugar dissolves.
now keep stirring keeping the flame on low till milk thickens and add saffron thread .furthermore, the milk forms dough after stirring for 10 minutes.do not over cook, as the burfi turns chewy.
now the dough separates from the pan.add in screw pine essence and combine well.Turn off Flame.
transfer the prepared dough into greased plate lined with baking paper.set well forming a block.now top with few chopped almonds and pistachios and press slightly.
allow to set for 2 hours, or till it sets completely.now unmould and cut into pieces square or diamond or rectangle of your choice finally, serve milk powder burfi or store in airtight container.
Notes:-
firstly, prepare the burfi on low – medium flame, else the milk powder burns.top the burfi with dry fruits of our choice like Cashew Nuts to make it more attractive or you can skip it.
If you like plain burfi then don’t add saffron just add 1/2 tsp of cardamom powder,instead of screw pine essence you can add rose essence or don’t add any essence ,you can Skip it .
additionally, add more sugar to make burfi more sweet if you like.
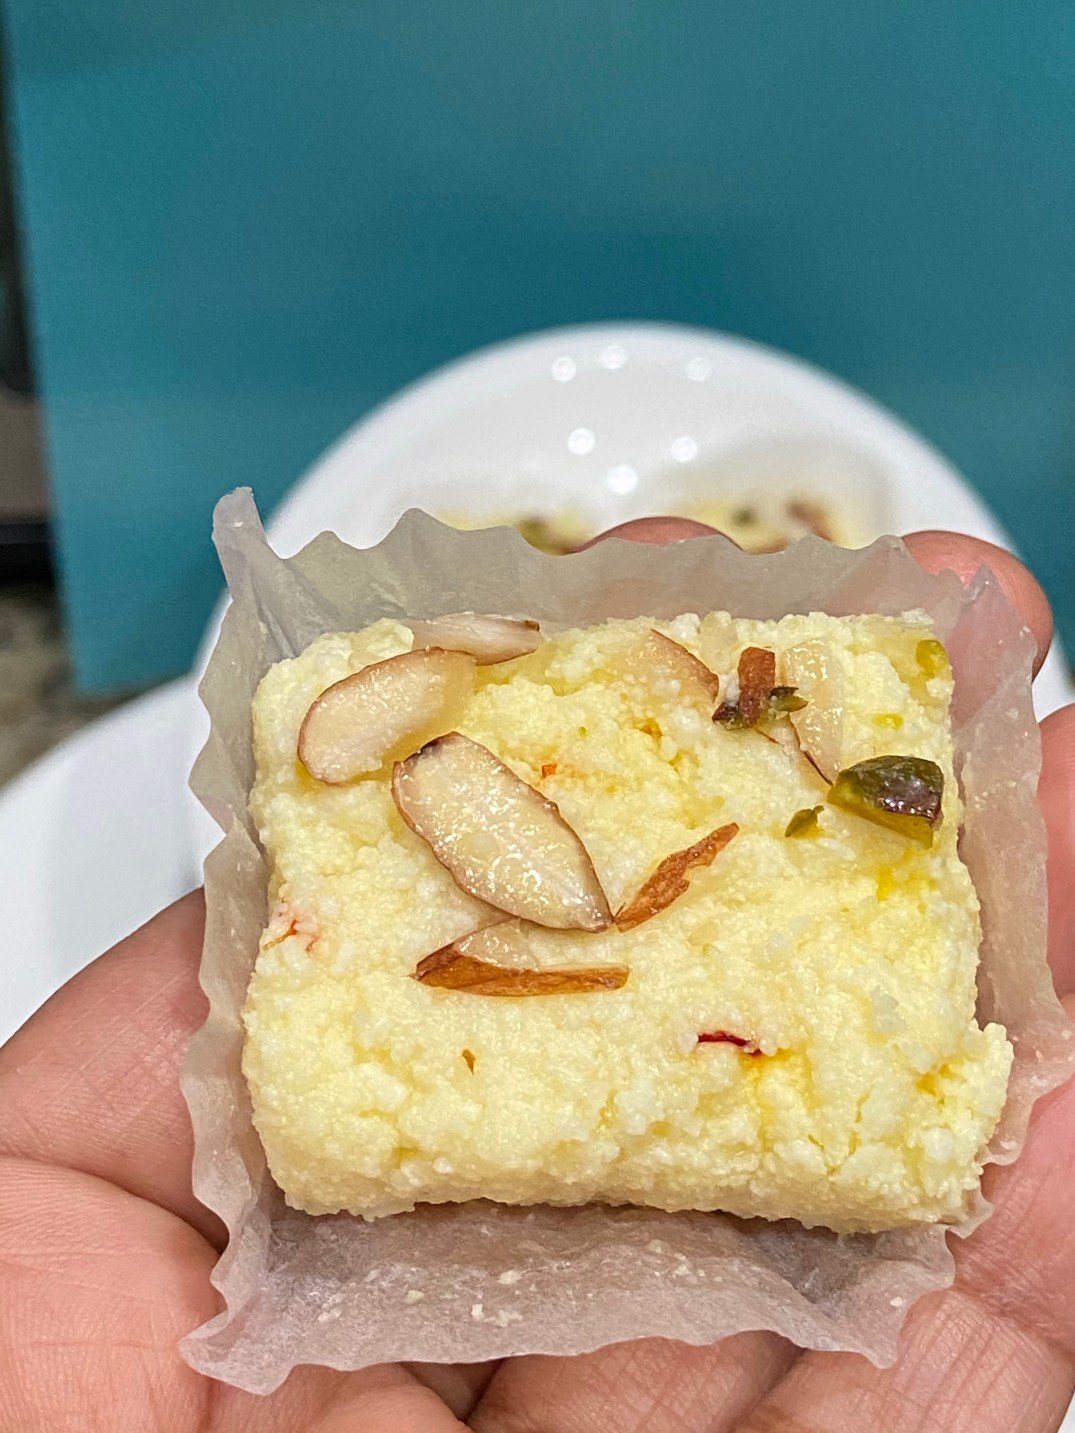
Beginning of this Navratri festival I made Kesar Kalakand. This recipe is very quick and easy.Kalakand can be made in many flavors and ways. Using cottage cheese Homemade paneer to make this. it’s a traditional indian sweet dessert prepared from condensed milk and Paneer ,flavored with Saffron and cardamom powder.
traditionally it is prepared by evaporating and solidifying the milk. later this thick milk is curdled, to which sugar is added and then cut into desired shapes.
I am sharing this recipe is a quick and instant version prepared by soft and moist paneer with condensed milk. hence the evaporation and curdling process which takes significant time is totally skipped. moreover no extra sugar is required as condensed milk contains sufficient amount of sweetness.
My daughter love Saffron flavor ,so i prepared this one for her and my family loved all type of Sweets.
Craving more? Subscribe to desiswadbyaayushi to get new recipes and a weekly newsletter delivered straight to your inbox! And stay in touch on Facebook, Twitter, Pinterest and Instagram for all of the latest updates.
Method
Soak saffron in warm water and leave aside for 10 minutes. Wait till water changes it colour to yellow-orange.
Heat a nonstick pan and add crumbled paneer always use fresh homemade paneer as they will be more moist and fresh.further add condensed milk and milk powder.mix well making sure the condensed milk and paneer are mixed well.
mix and mash continuously till the mixture thickens.keep the flame on medium and keep stirring.cook on medium flame till the condensed milk melts completely and the mixture starts to thicken.
add cardamom powder and saffron water mix well,keep stirring till the mixture starts to separate the pan and forms a like a dough,add screw pine essence and turn off flame transfer the mixture to the greased plate or square box or any dish ,level it up and set to a block making an inch thick.
add finely chopped pistachios and almonds or any nuts of your choice.press gently with the back of spoon so that the nuts stick to kalakand.
cool completely for 2-3 hours, or refrigerate for 30 minutes if you are in hurry,however, cooling naturally will make kalakand more moist and tasty so leave on kitchen counter.
cut the kalakand into square pieces or your choice either rectangle or diamond Shape.
finally serve or store instant kalakand for a week by refrigerating.
Notes
either use grated homemade paneer or crumble with hand.
if you want to make original kalakand then skip adding saffron water for white kalakand.
I haven’t used food colour ,if you like bright yellow which you see at sweets shop ,then one can add food color , however this is totally optional.
Made from authentic Chinese flavours, this dish is a must-try! Chicken Manchurian is a dish liked by all age groups as a starter dish at parties. Fried chicken balls cooked in a spicy sauce batter and served with Fried Rice steamed rice or Veg or Chicken noodles.
A traditional indo Chinese dish that can be made at home by some simple ingredients and method.
The creation of Chicken Manchurian is in fact credited to Nelson Wang of China Garden who introduced Manchurian to Mumbai in 1975. He started playing around with quintessential Indian ingredients like garlic, ginger, chilli and just added a splash of soya sauce instead of garam masala – and voila.
Instead of deep-frying chicken balls in this recipe, I am sharing Air fried chicken balls recipe which will simmer in delectable gravy. And using Coconut Secret Coconut Aminos instead of soy sauce in gravy.
Ingredients
Minced chicken 1 lbs /500 gm
2 tbsp all purpose flour
1 tbsp refined oil or Canola oil
1 carrot, grated
1/2 red bell pepper chopped
1/2 cup shredded cabbage
1/4 tsp minced garlic or garlic powder
Salt to taste
for Gravy
1 tbsp Chilli oil /any cooking oil
1 medium onion Sliced
1-2 chopped green chilli
1/4 cup mixed veggies (carrot/cabbage /red bell pepper)
1/2 to 1 cup chicken stock or Water
2 tbsp water
1 tbsp corn flour
1 tbsp Vinegar
1 tbsp light soya sauce or Coconut Aminos
1 tbsp chilli garlic sauce
1tbsp Tomato ketchup (optional)
salt to taste
Craving more? Subscribe to desiswadbyaayushi to get new recipes and a weekly newsletter delivered straight to your inbox! And stay in touch on Facebook, Twitter, Pinterest and Instagram for all of the latest updates.
Method
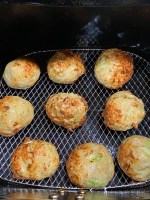
Preheat your airfryer on 360 F or select menu for chicken/poultry.
Meanwhile, Take a bowl and add minced chicken, chopped veggies, minced garlic or garlic powder, all-purpose flour, seasoned with salt (be careful while adding salt as we will add in Gravy too.)Mix all these ingredients properly and prepare a batter. brush your air fryer with oil, before keeping chicken balls to cook.
Apply oil on airfryer basket or use spray oil for cooking it will prevent from sticking uncooked chicken balls.
Next, apply oil on your palm to make chicken balls or with a help of spoon Scoop and make a shape. Place the ball one by one. Make the sure gap between balls so it cooked evenly.
Let it cook for 10-15 min or till its fully cooked, merely turn in between for even color and crunchiness. Just apply little bit oil to balls with brush or spray it(Optional)
Cooked entire chicken mixture in a similar manner.Remove to a plate and keep it aside.
Heat oil in a pan to prepare gravy for Manchurian. I am using chili oil you can take any oil of your choice.
Add sliced onion and green chilies and saute it.
Add veggies and cook it .
Add chilli garlic sauce ,coconut aminos or Soy sauce and then add chicken stock or water and boil it .
Add Chicken balls in boiling gravy and slowly cornflour & water Slurry to thicken gravy and once it starts thickening as per your preference add vinegar,salt to taste and check seasoning then shut off the flame.
Serve it hot With Steamed Rice/Noodles or Fried Rice.
Notes:- Adding veggies to chicken minced is completely optional.
Quantity of Sauce depends on individual preferences (Add green chilli sauce or red chilli sauce or skip it)
Add the sauce mixture, and simmer till the sauce thickens and becomes translucent.
Always break one cooked ball and check as it’s completely cooked from inside
Don’t imbibe or eat half cooked or uncooked its not at all healthy.
Subscribe to get new recipes and a newsletter delivered straight to your inbox
Gosht refers to tender meat, cooked for a long time, and used as an ingredient in a number of Middle Eastern cuisine, Central Asian cuisine and cuisine of the Indian subcontinent. The word stems from the Persian word gosht, meaning “meat” or “flesh”, especially that of a goat.
Aloo Gosht (mutton & potato curry) is a spicy meat gravy that has potatoes cooked with lamb or Goat meat in a thick stew. Different parts of India prepare this dish in different ways.
Today I am sharing my own recipe for Aloo Gosht using a pressure cooker and you can check my other non-veg curry Recipes. and at the end do check important notes.
Craving more? Subscribe to desiswadbyaayushi to get new recipes and a weekly newsletter delivered straight to your inbox! And stay in touch on Facebook, Twitter, Pinterest and Instagram for all of the latest updates.
method
Wash and clean mutton and keep aside. Heat 1 tbsp oil in a pressure cooker. Add potatoes and fry until they turn slightly brown. Remove the potatoes on a plate. Add remaining oil and heat put in the whole garam masala. When they start to crackle, put in the chopped onions and fry till they turn golden brown. Add ginger-garlic paste and fry again for about two minutes or till raw smell goes away.
lower heat while adding dry spices powder to prevent it from burning and fry on medium heat till the oil comes up. Now add mutton and cilantro (you can add at the end but my family don’t like in Non-veg food so I always while cooking only)stir fry on a high flame for 2 minutes. Pour in hot water and add salt. Put the lid and cook for 5-6 whistles and turn off the heat and let it release pressure on its own. once pressure release naturally open the lid carefully as the gravy will be very hot and
Check mutton, using a fork or spoon does it cook properly and mutton is very tender .add more water if necessary. You can make this as thick or thin as you like (we prefer it a little thicker Check seasoning, adding more salt if necessary and at last add fry potatoes and cook until the potatoes are very soft but not falling apart.
Serve it with white steamed rice /roti /paratha or naan Along with Green salad or PIckled onion.
Notes:-
pressure cook this mixture for about 5-6 whistles on high flame depending on your meat quality.
for open pot wait for the mixture to come to a boil, cover the lid, and let it cook for about 45 minutes or so, depending on your meat goat takes longer than lamb.
This gravy is a blend of many different spices and has to be carefully balanced to bring out the flavours the best quality mutton. The mutton pieces should be pink in colour and with bones. Try to use meat from the hind leg of the goat. They are the best to make curries.
You can make the gravy soupy by adding more water to it but my family prefer thick gravy only. You can use a tbsp Badshah brand Nawabi Mutton Masala or( you can skip )in the recipe too for a delicious flavour
If you don’t have a pressure cooker, you can cook this curry in a normal heavy bottom pan. Just that it will take more time for the mutton to get cooked properly.
Subscribe to get new recipes and a newsletter delivered straight to your inbox
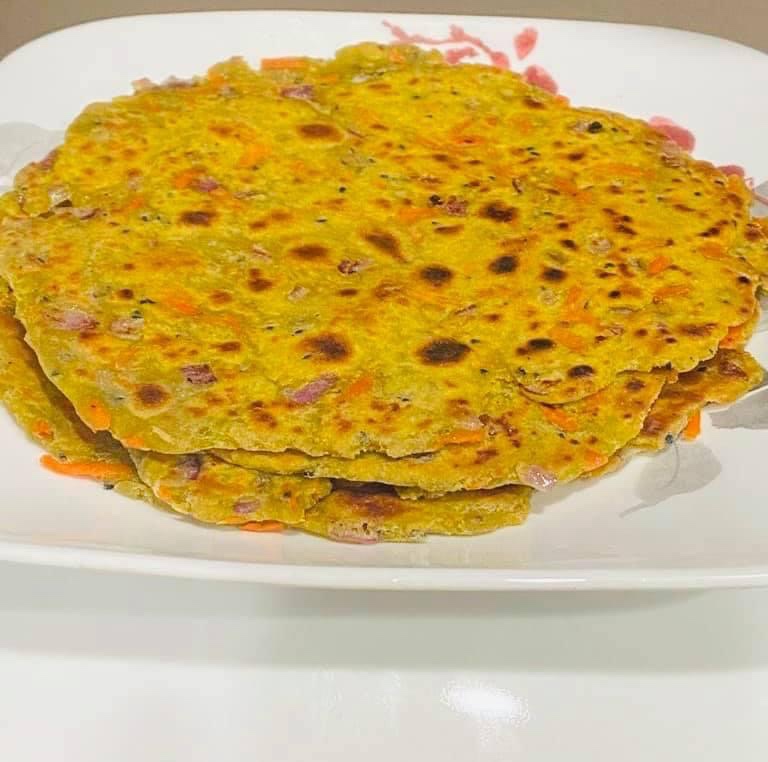
Guacamole Paratha Recipe is a quick to make flat bread, that makes a wholesome and delicious breakfast. The creaminess of the Avocado in the paratha is keeps the paratha soft and yet crispy from the outside. You can serve it for breakfast, a quick lunch or even pack it into a kids lunch box
I have shared by Guacamole recipe in my last blog . It has become very popular in Indian kitchens these days. so after eating with tortilla chips ,just get an idea to make something which every Indian like something Yummy & healthy too .check my other paratha recipes
So here I am sharing Quick Version of Paratha (called as Indian flatbread)
ingredients
2 cups Whole Wheat Flour
Salt to taste
Guacamole 3-4 tbsp
1 grated carrot (optional)
oil/ghee for cooking
Craving more? Subscribe to desiswadbyaayushi to get new recipes and a weekly newsletter delivered straight to your inbox! And stay in touch on Facebook, Twitter, Pinterest and Instagram for all of the latest updates.
Method
Take a mixing Bowl add the wheat flour and Guacamole and grated carrot then knead all the ingredients together until it forms a smooth dough. Do not add any water. The moisture in the guacamole will be enough to form the dough.
Cover the bowl and leave it aside for about 30 mins.
Divide the dough in small portions. Roll the portions into balls; flatten them with the palm of your hand. Toss them in flour or apply oil on rolling pin to and roll them out into thin circle.
As you roll them out, you can keep tossing the dough in dry flour to prevent sticking when rolling them out. Continue the same process of rolling the dough out with the remaining balls. It is ideal when you can roll out the all portions of dough before you can start cooking them.
Place a skillet on high heat, place the rolled out dough on the skillet. After a few seconds you will notice small air pockets popping out.
At this point flip the paratha and smear about 1/2 a teaspoon of ghee or oil and using a flat spatula and do a light pressing and turning motion to cook to the parathas. Flip to the other side and press and turn in a similar way. You will notice brown spots around the cooked paratha. Remove from heat and place on a flat plate. Continue the similar process with the remaining rolled out portions.
Serve Avocado Paratha with pickle or Curd or ketchup or pickled onion and enjoy
notes
if in case at the end you feel that the dough is little too dry, add couple of tbsp. of water to bring it together Dough.
Adding Salt to paratha dough ,just be careful as Guacamole also contain Salt.
Subscribe to get new recipes and a newsletter delivered straight to your inbox
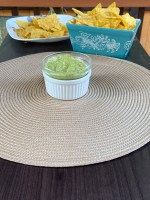
The best guacamole keeps it simple just-ripe avocados, salt, a squeeze of lime, onions, chillies cilantro, Serve it as a dip at your next party or do try with any Mexican food.
All you really need to make guacamole is ripe avocados and salt. After that, a little lime or lemon juice—a splash of acidity—will help to balance the richness of the avocado. Then if you want, add chopped cilantro, chillies, onion or tomato.
1-2 serrano chillies or any Mexican chillies (stems and seeds removed) minced or to taste
2 tablespoons cilantro (leaves and tender stems), finely chopped
Tortilla chips, to serve
Craving more? Subscribe to Tastebuds to get new recipes and a weekly newsletter delivered straight to your inbox!
And stay in touch on Facebook, Twitter, Pinterest and for all of the latest updates. tag me on Instagram@tastebuds_homemade_recipes using the hashtag #tastebudshomemaderecipes and stay connected i would love to see your creations from my space!!
METHOD
Cut the avocado, remove flesh Cut the avocados in half. Remove the pit. scoop out the flesh with a spoon. Place in a bowl.
Using a fork, roughly mash the avocado. (i prefer smooth, one can leave it Chunky as Prefer)
Add salt, lime juice, and the rest: Sprinkle with salt and lime (or lemon) juice. Add the chopped onion, cilantro, and chillies.
Start with this recipe and adjust ingredients to your taste.
Serve immediately with tortilla chips.
Tips How to check if Avocados are good or Bad
Always use ripe avocados that are just the right amount of ripeness. Not ripe enough and the avocado will be hard and tasteless. Too ripe and the taste will be not good
gently pressing the outside of the avocado if you are not able to press, the avocado is not ripe yet and will not taste good.
if you are able to press it means, the avocado is ripe and you can see the green from stem side.
if you able to press and it’s really soft and brown from stem side then avocado may be past ripe and not good. In this case, a taste test first before using.
if making a few hours ahead, place plastic wrap on the surface of the guacamole and press down to cover it and to prevent air reaching it. (The oxygen in the air causes oxidation which will turn the guacamole brown.) Refrigerate until ready to serve.
The acid in the lime juice will provide some balance to the richness of the avocado and will help delay the avocados from turning brown.
Chillies (jalapeños, serranos) vary individually in their hotness. So, start with a half of one chilli pepper and add to the guacamole to your desired degree of hotness.
Subscribe to get new recipes and a newsletter delivered straight to your inbox
A quick, easy, and flavorful indian -style pizza, made with pita bread and topped with a Homemade Paneer and veggies. personal pizzas with greek pita. Topped with a good quality jarred pizza sauce, shredded cheese, marinated paneer and lot of veggies. my family love it.
2 tbsp shredded pizza cheese or shredded Mozzarella or as you like
Paneer Cubes 10-12
onion medium Cube size
Bell pepper cube (yellow, red, green)
tikka masala 1 tbsp
Italian seasoning 1 tsp (optional)
red chilli flakes (optional)
Craving more? Subscribe to desiswadbyaayushi to get new recipes and a weekly newsletter delivered straight to your inbox! And stay in touch on Facebook, Twitter, Pinterest and Instagram for all of the latest updates.
method
Marinate paneer cubes in Tikka masala for an hour.
meanwhile chopped veggies and cut in cubes or sliced
Making your own homemade pizza couldn’t be any quicker or easier! It’s just 10 minutes to build and cook this pita pizza, so there’s no reason not to try it! Spray the inside of the air fryer basket with non-stick cooking spray.
on top of pita apply pizza sauce and arrange veggies and marinated paneer and sprinkle Italian seasoning and red chilli flakes (optional)
put carefully pizza in air fryer and Topped it with cheese.
Cook the pita pizza in the air fryer at 400F for 5 minutes or till cheese melt
Notes
If you haven’t yet cooked pizza in your air fryer, you need to try it! The crust is so wonderfully crispy and light and cheese and tomato sauce meld together so perfectly. I promise you, you won’t be disappointed!
It’s also so quick! Just 5-6 minutes cook time, what’s not to love! If you don’t have an air fryer, you can bake these in the oven at 400F for around 10 minutes.
I have used a round white pita bread that fits right in the air fryer basket. I find the white pita gets really nice and crispy, but you can use whole grain one also.
Subscribe to get new recipes and a newsletter delivered straight to your inbox
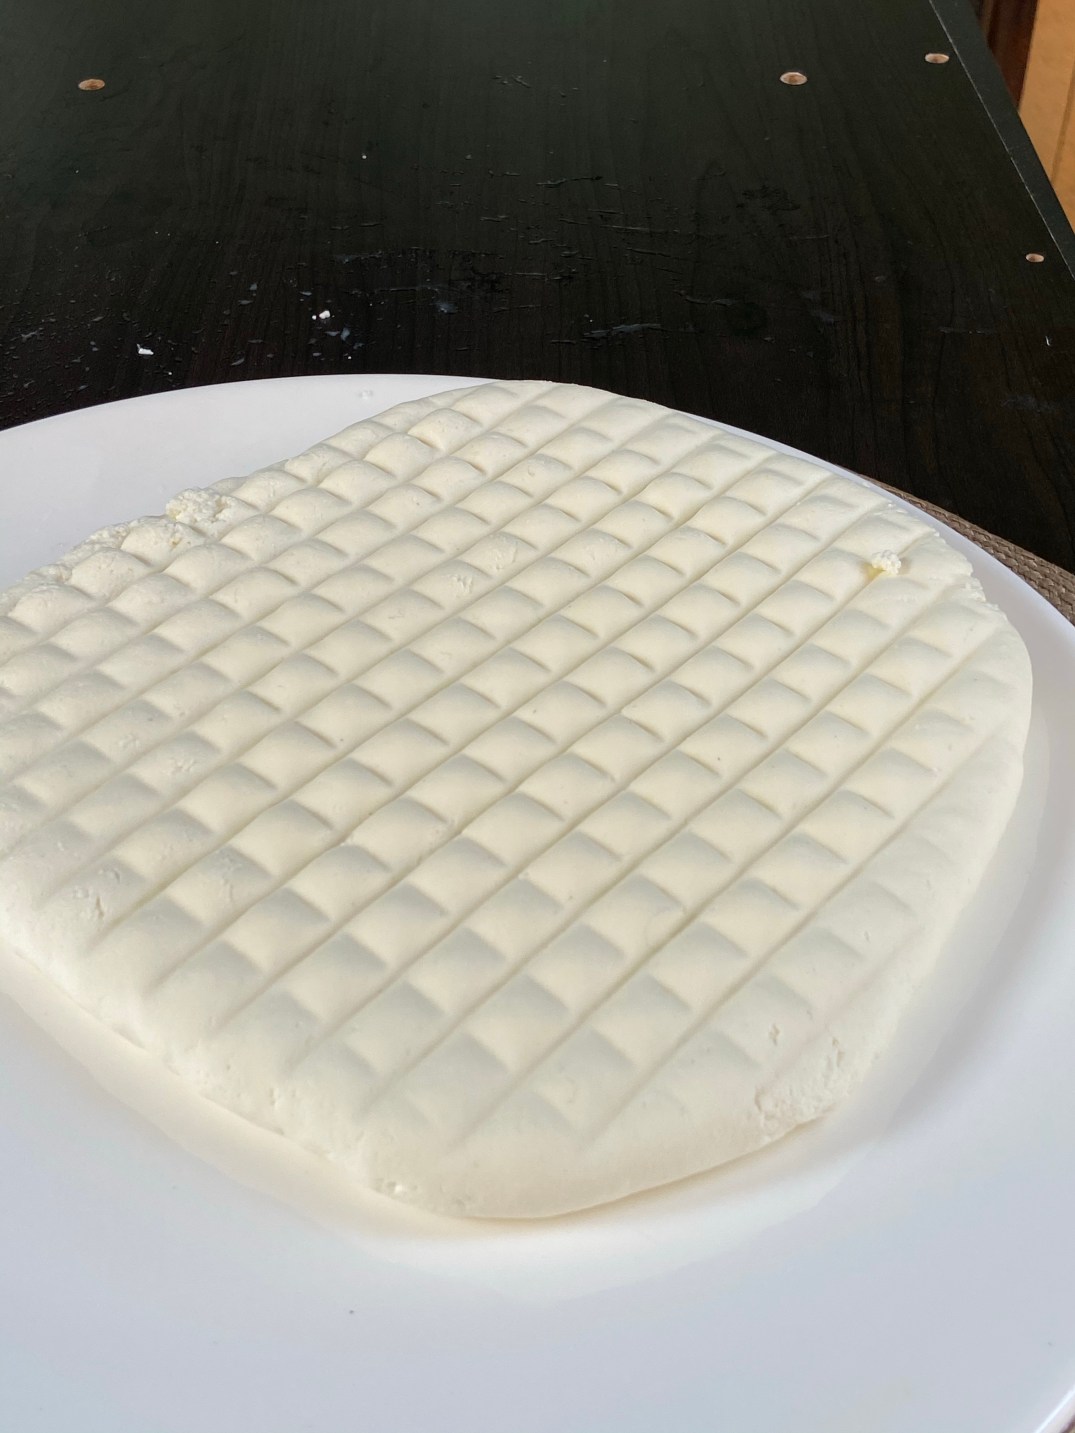
It is the simplest cheese to make at home. Unlike other cheeses, it needs no special equipment or complicated technique. vinegar, a piece of muslin cloth and a strainer. everyday kitchen stuff is all that one needs to turn out the delicious paneer in a matter of minutes.
Craving more? Subscribe to desiswadbyaayushi to get new recipes and a weekly newsletter delivered straight to your inbox! And stay in touch on Facebook, Twitter, Pinterest and Instagram for all of the latest updates.
Method
Step by step
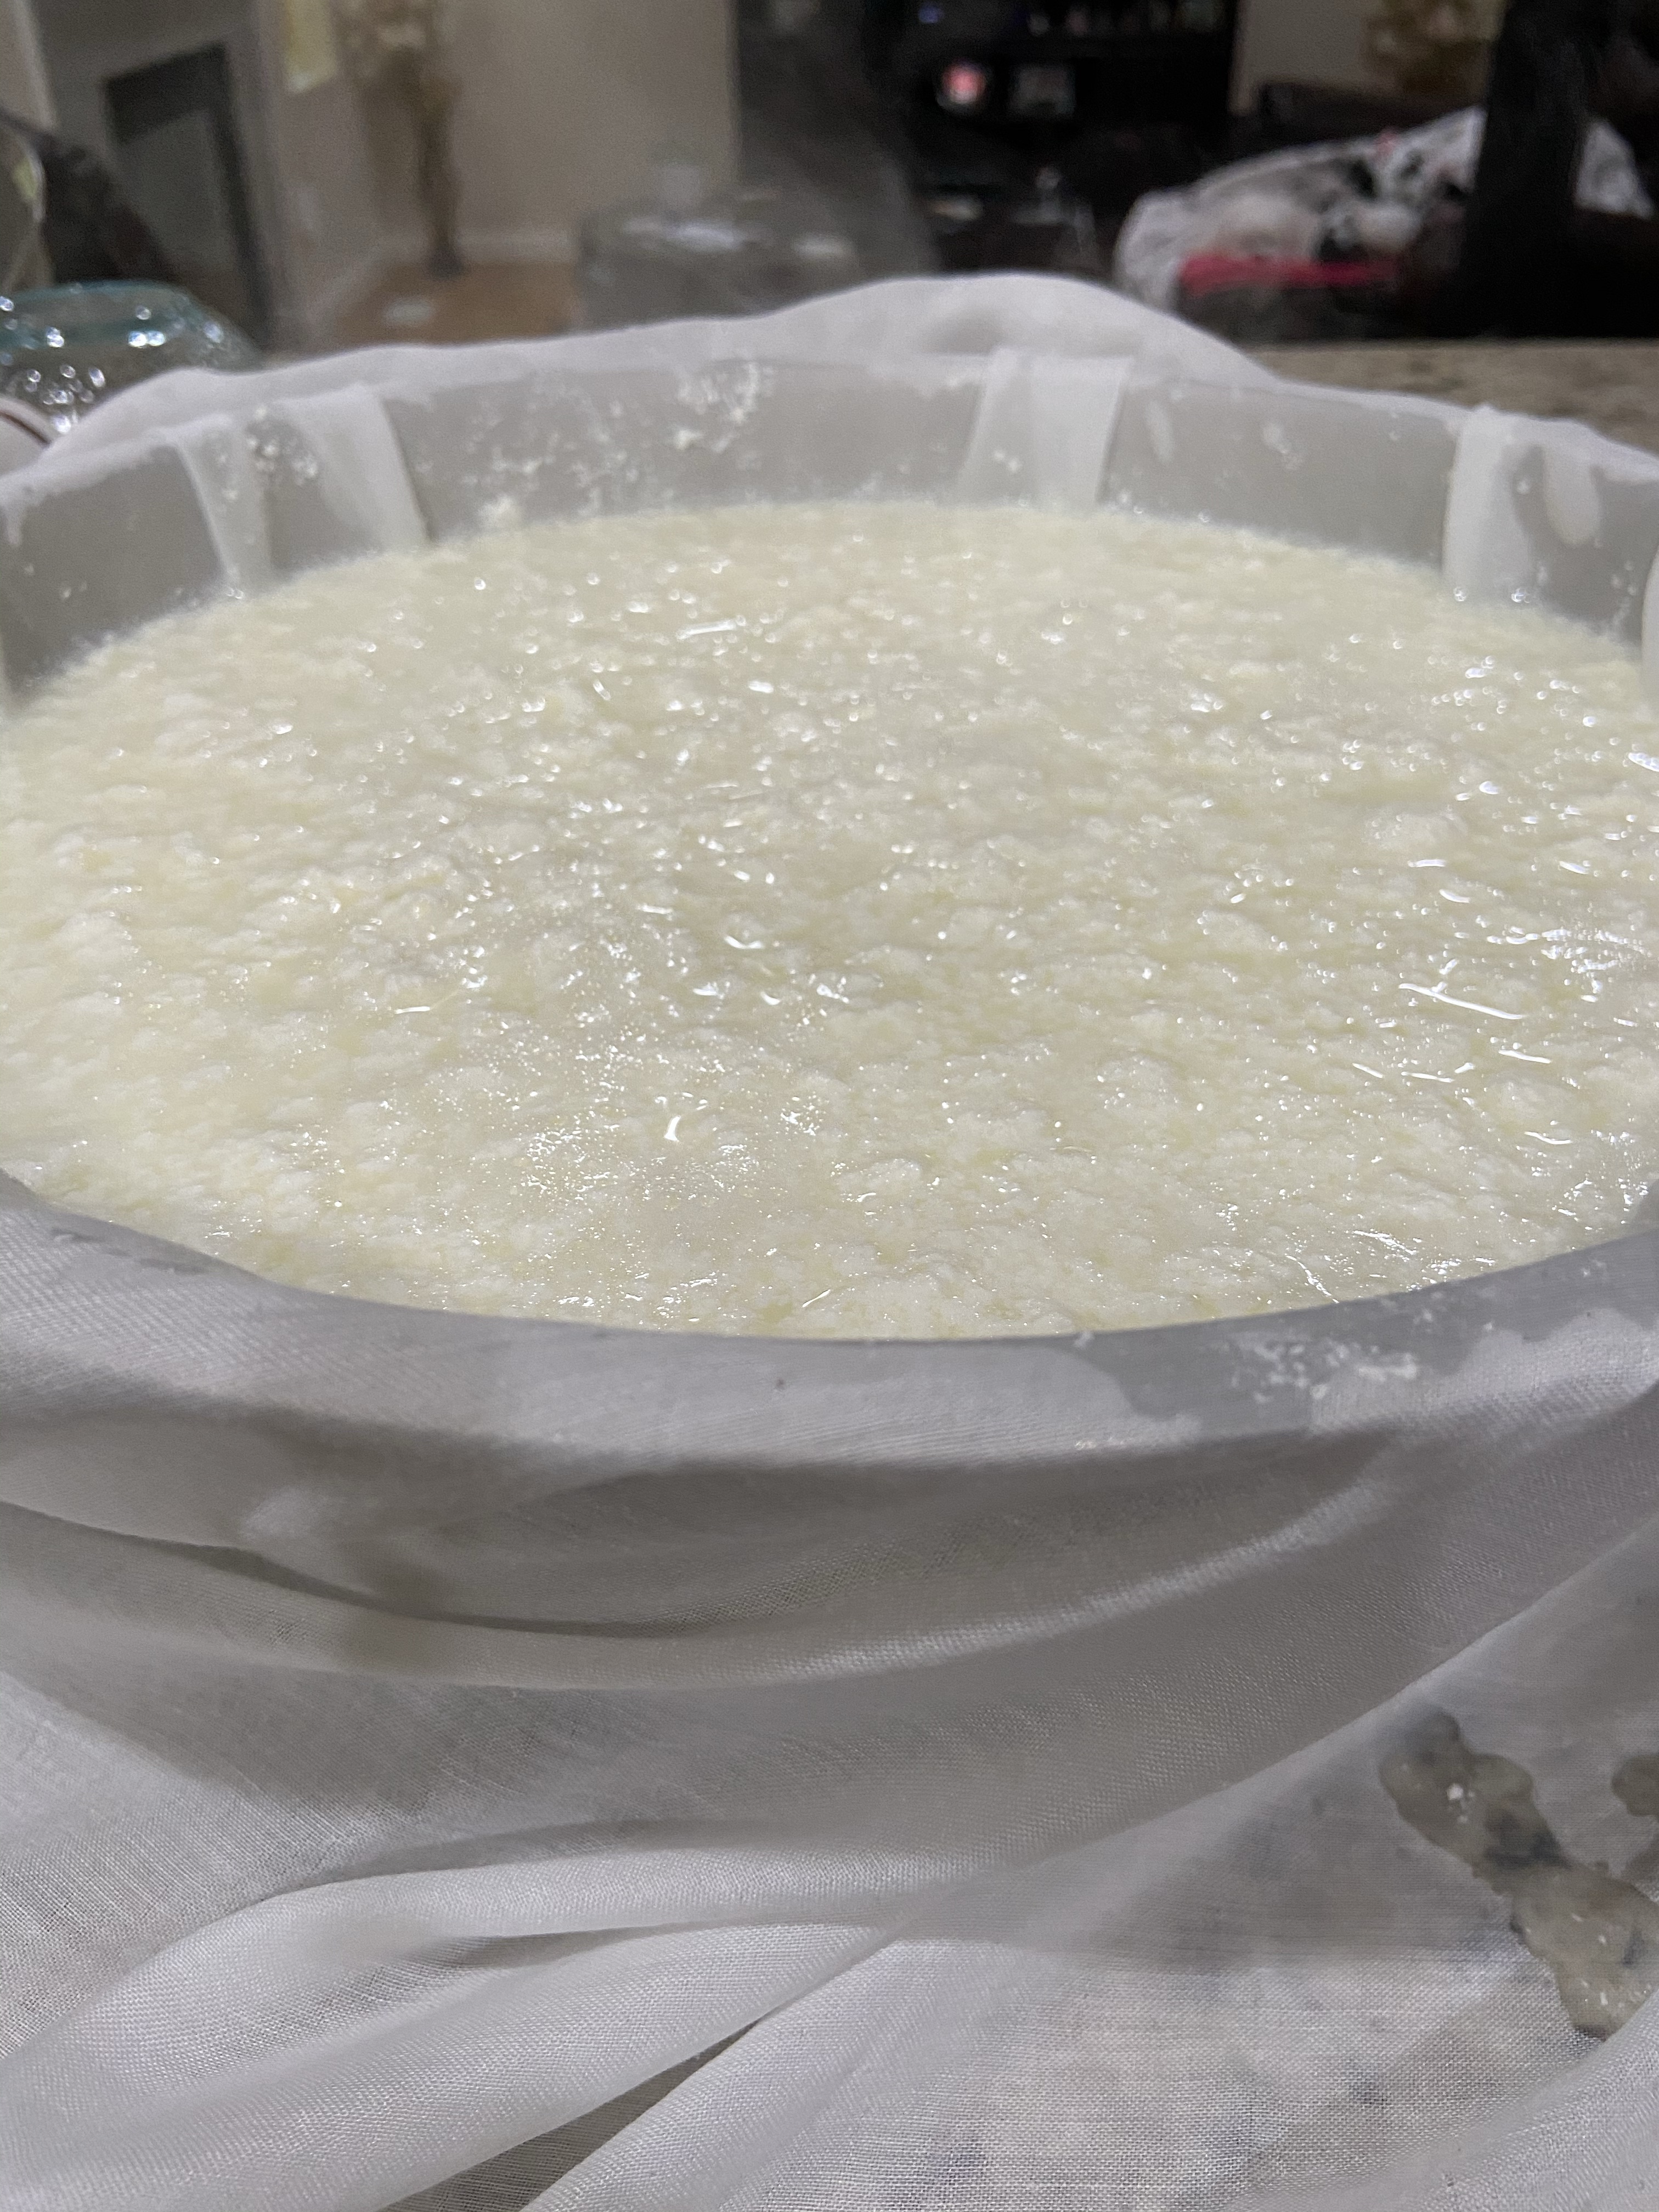
Bring three-litre of milk to boil. once it boils turn off flame Immediately.
add vinegar and stir slowly till the milk curdles and separates from the whey.
Add ice so it stops cooking and paneer will be soft.
Drain that Split milk(Cheese) in a Dish cover with a muslin cloth or cheesecloth.
wash with fresh water to remove tanginess of paneer.
Dip the cloth in chilled water so that it cools down completely. Squeeze out the water again.
Place the paneer under a heavyweight so that all the water drains away and the paneer sets in a block.
after 2 hours or Until all water Drained, Paneer is ready to use.
note: for every litre of milk use 100 ml of Cream
keep extra vinegar with you if milk doesn’t split use it.
Subscribe to get new recipes and a newsletter delivered straight to your inbox
Idli Bites-Super soft and spongy idlis coated in spicy and tasty masala and tempered with mustard and curry leaves coated with few spices and it really tastes yum.
Here in the United States, no one discards leftover food so I always do make something new recipe with my leftover food and even my husband told me I can develop a new recipe with any leftover food either its a snack or desserts.
Normally in South India, they use chutney podi and leftover idlis to make the podi idli or masala coated idlis but tweak the recipe and use the simple basic spices, onion slices and just little bit red chilli powder and tomato chilli ketchup for some tanginess and trust me it really taste yummy.
Craving more? Subscribe to Tastebuds to get new recipes and a weekly newsletter delivered straight to your inbox!
And stay in touch on Facebook, Twitter, Pinterest and for all of the latest updates. tag me on Instagram@tastebuds_homemade_recipes using the hashtag #tastebudshomemaderecipes and stay connected I would love to see your creations from my space!!
ingredients
15-16 idlis
2-3 tablespoon extra virgin olive oil or ghee
1 tsp red chilli powder(to taste)
1 tbsp tomato chilli ketchup
1 tsp mustard seeds
few curry leaves
1 sliced onion
salt to taste
Method
Cut the idlis into four, six or eight equal parts depending upon the size of your idlis. Heat oil in a pan and add mustard seeds and curry leaves let it crackle .add sliced onion and saute till it becomes translucent add red chilli powder, ketchup and salt to taste. Add the sliced idlis into the pan and mix gently to coat the idlis in the masala.
Remove from heat and serve with your favourite chutney
NOTES
Adjust the spices as per your taste and preferences.
Subscribe to get new recipes and a newsletter delivered straight to your inbox
Soft, fluffy and delicious banana pancakes made without eggs. Indeed these pancakes are one of the yummy and delicious.
These make a great BREAKFAST and can be made under 15 minutes. They can be served with any kind of your favourite toppings.
Like butter /maple syrup or any fruits of yoUr choice or Chocolate syrup with caramelized bananas & choco chips are some of the toppings that go very well for these pancakes.
It works well with plain flour or whole wheat flour. I have used Self-raising flour and almond Flour.
I have used fat-free milk in this recipe, since. You can also use plain water or any nut milk or organic milk.
Craving more? Subscribe to Tastebuds to get new recipes and a weekly newsletter delivered straight to your inbox! And stay in touch on Facebook, Twitter, Pinterest and Instagram for all of the latest updates.
Ingredients
2 overripe banana
3/4 cup Fat-Free milk
1 cup Self Raising flour or all-purpose flour + 1.5 tsp baking powder
2 tbsp Almond flour
Toppings
Maple Syrup
Butter (optional)
Method
In a bowl, mash the peeled banana and add milk and make a smooth paste.in a separate bowl Take self-raising flour & Add-in Banana and milk mixture. Whisk until incorporated. Let the batter sit for a few minutes.
Spray a flat pan or griddle with oil and heat it up to medium to low heat. Add a small ladle of pancake batter
Let it cook until the middle becomes bubbly and the corners set, then flip with a spatula. Let it cook on the other side until done. Repeat for all the pancakes.
Stack the pancakes, drizzle with Maple Syrup add a dash of butter (optional ) or top with fresh fruits or whipped cream.
Notes:-
If the batter spreads too much in the pan, whisk a bit more flour into the batter. If it doesn’t spread enough, add a bit more milk. Flip the pancakes when you see small bubbles in the centre.
If your pancakes are golden brown on the outside but not cooked all the way through, reduce the heat!
If your pancakes stick to the pan, make sure you use a non-stick pan or griddle and to spray the pan with oil before adding the batter.
Subscribe to get new recipes and a newsletter delivered straight to your inbox 👇
No-Bake Mango cheesecake recipe it’s a delicious cheesecake recipe with fresh mango puree and cream cheese .
An appropriate dessert for guests or parties. I have used gelatine to set the mango layer but you can use agar-agar or China grass, a vegetarian alternative used for the same purpose.
This mango cheesecake is a great recipe to try during the mango season, fresh mangoes always work best 👍.instead of Cracker I have used leftover cake Slices as a bottom layer and its taste really awesome 👌👌
Do check out My other cheesecake Recipes 🍰
Craving more? Subscribe to desiswadbyaayushi to get new recipes and a weekly newsletter delivered straight to your inbox! And stay in touch on Facebook, Twitter, Pinterest and Instagram for all of the latest updates.
Ingredients
Cake Slice for Base 10-12
Cream cheese 8 oz pack – 1
Cool Whip Whipped Topping, 8 oz Tub
Gelatin 1.5 tbsp +1/2 tbsp
Sugar 1 tbsp +1/2 tbsp (to mix in gelatin)
Warm Water(in microwave) 1 cup + 1/2 cup(to dissolve gelatin)
Organic and Ripe Mango puree 1 cup +3/4 cup
Springform Pan 9″
Method
Step 1 take a springform pan then add cake slices and cover Springform pan and press with a help of a spoon, keep in a fridge for 10-15 min.
Step 2
Take 1 cup warm water in a bowl to add 1.5tbsp gelatin & 1 tbsp sugar mix till it dissolved, cover & keep aside.
take a blender jar to add cream cheese, dissolve gelatin,& mango puree till it blended smoothly and then add cool whip and fold gently till everything mix properly .take out springform Pan from fridge & pour the mix on top of set Crackers crumbs mix, keep in a freezer for 20-30 min or till it set.
Step 3
Take 3/4 cup mango puree in a bowl dissolve same way 1 tbsp gelatin +1/2 tbsp sugar & now add dissolve gelatin in mango puree & mix properly if needed add more sugar in mango puree.
take out springform pan from freezer & check 2nd layer set properly. now pour mango puree on top of it * keep in a fridge to set once it set Cut & enjoy Ur No-Bake Mango cheesecake.
During the weekend I prepare this cheesecake dessert to eat after a barbecue lunch with the family. when you’re in need of a dessert for your family these ideas will take your dessert spread to the next level—no baking required. there’s something for every sweet tooth in here.
this recipe is so simple, it’s endlessly adaptable. Of course one can use different flavoured pudding mixes Or extracts to the filling for extra flavour😋
In addition, you can jazz things up by serving the cheesecake with either fresh or cooked fruit on top like strawberries, peach slices, or blackberries, raspberry or mango etc.
Craving more? Subscribe to desiswadbyaayushi to get new recipes and a weekly newsletter delivered straight to your inbox! And stay in touch on Facebook, Twitter, Pinterest and Instagram for all of the latest updates.
Ingredients
8OZ package cream cheese, room temperature
2cup whole milk
1 package Jell-O Vanilla Instant Pudding
For Crust
1 cup Graham Cracker Crumb for Crust
Butter Melted-1/4 cup
Store-bought Strawberry Topping
Whipped Cream for Decoration
1 cup heavy whipping cream
1 tablespoon sugar
method
Take a bowl to add crushed graham crackers or crumbs & melted butter mix properly.take a springform pan or pie pan then add crackers mix in Springform pan and press with a help of a spoon, keep in a fridge for 10-15 min. Beat the cream cheese with ½ cup milk until smooth. Add the remaining 1 ½ cups milk and the Instant Pudding mix, and beat until smooth.
Pour filling into prepared graham cracker crust and let chill in the fridge for at least one hour. The spread strawberry topping on top of chilled & Set cheesecake
To make whipped cream, add cream and sugar to your mixer and whisk on medium-high speed until stiff peaks form. Pipe on cooled cheesecake.
Slice, Serve & Enjoy this delectable dessert🍰
to get new recipes and a weekly newsletter delivered straight to your inbox
Baking is an enjoyable endeavor, but it can also get tricky. However, it’s not impossible to make something at home that looks and tastes like the work of a professional.
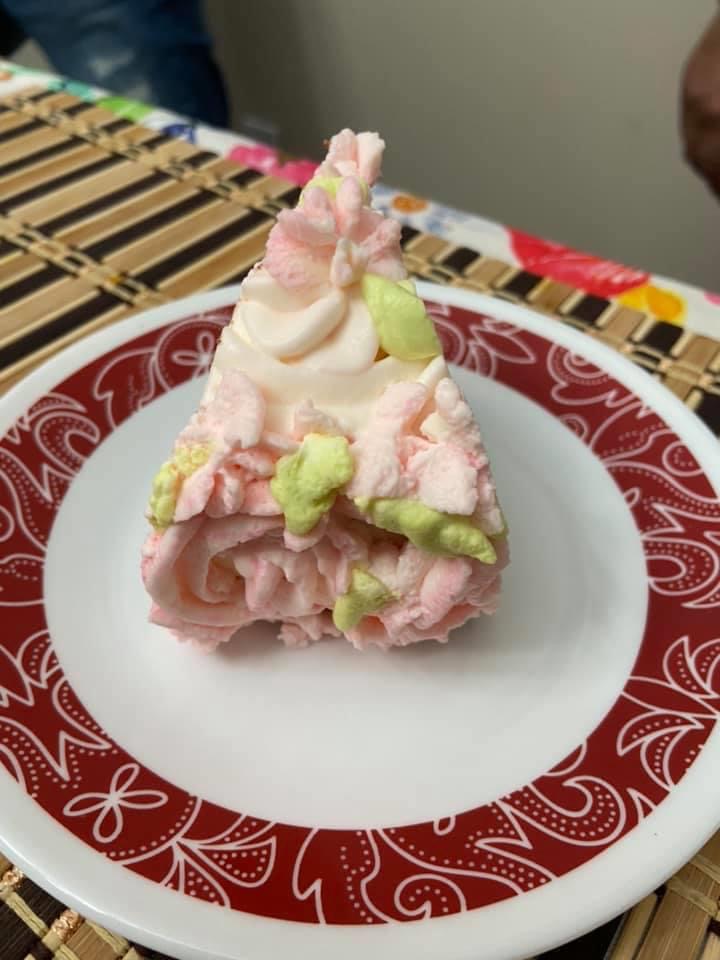
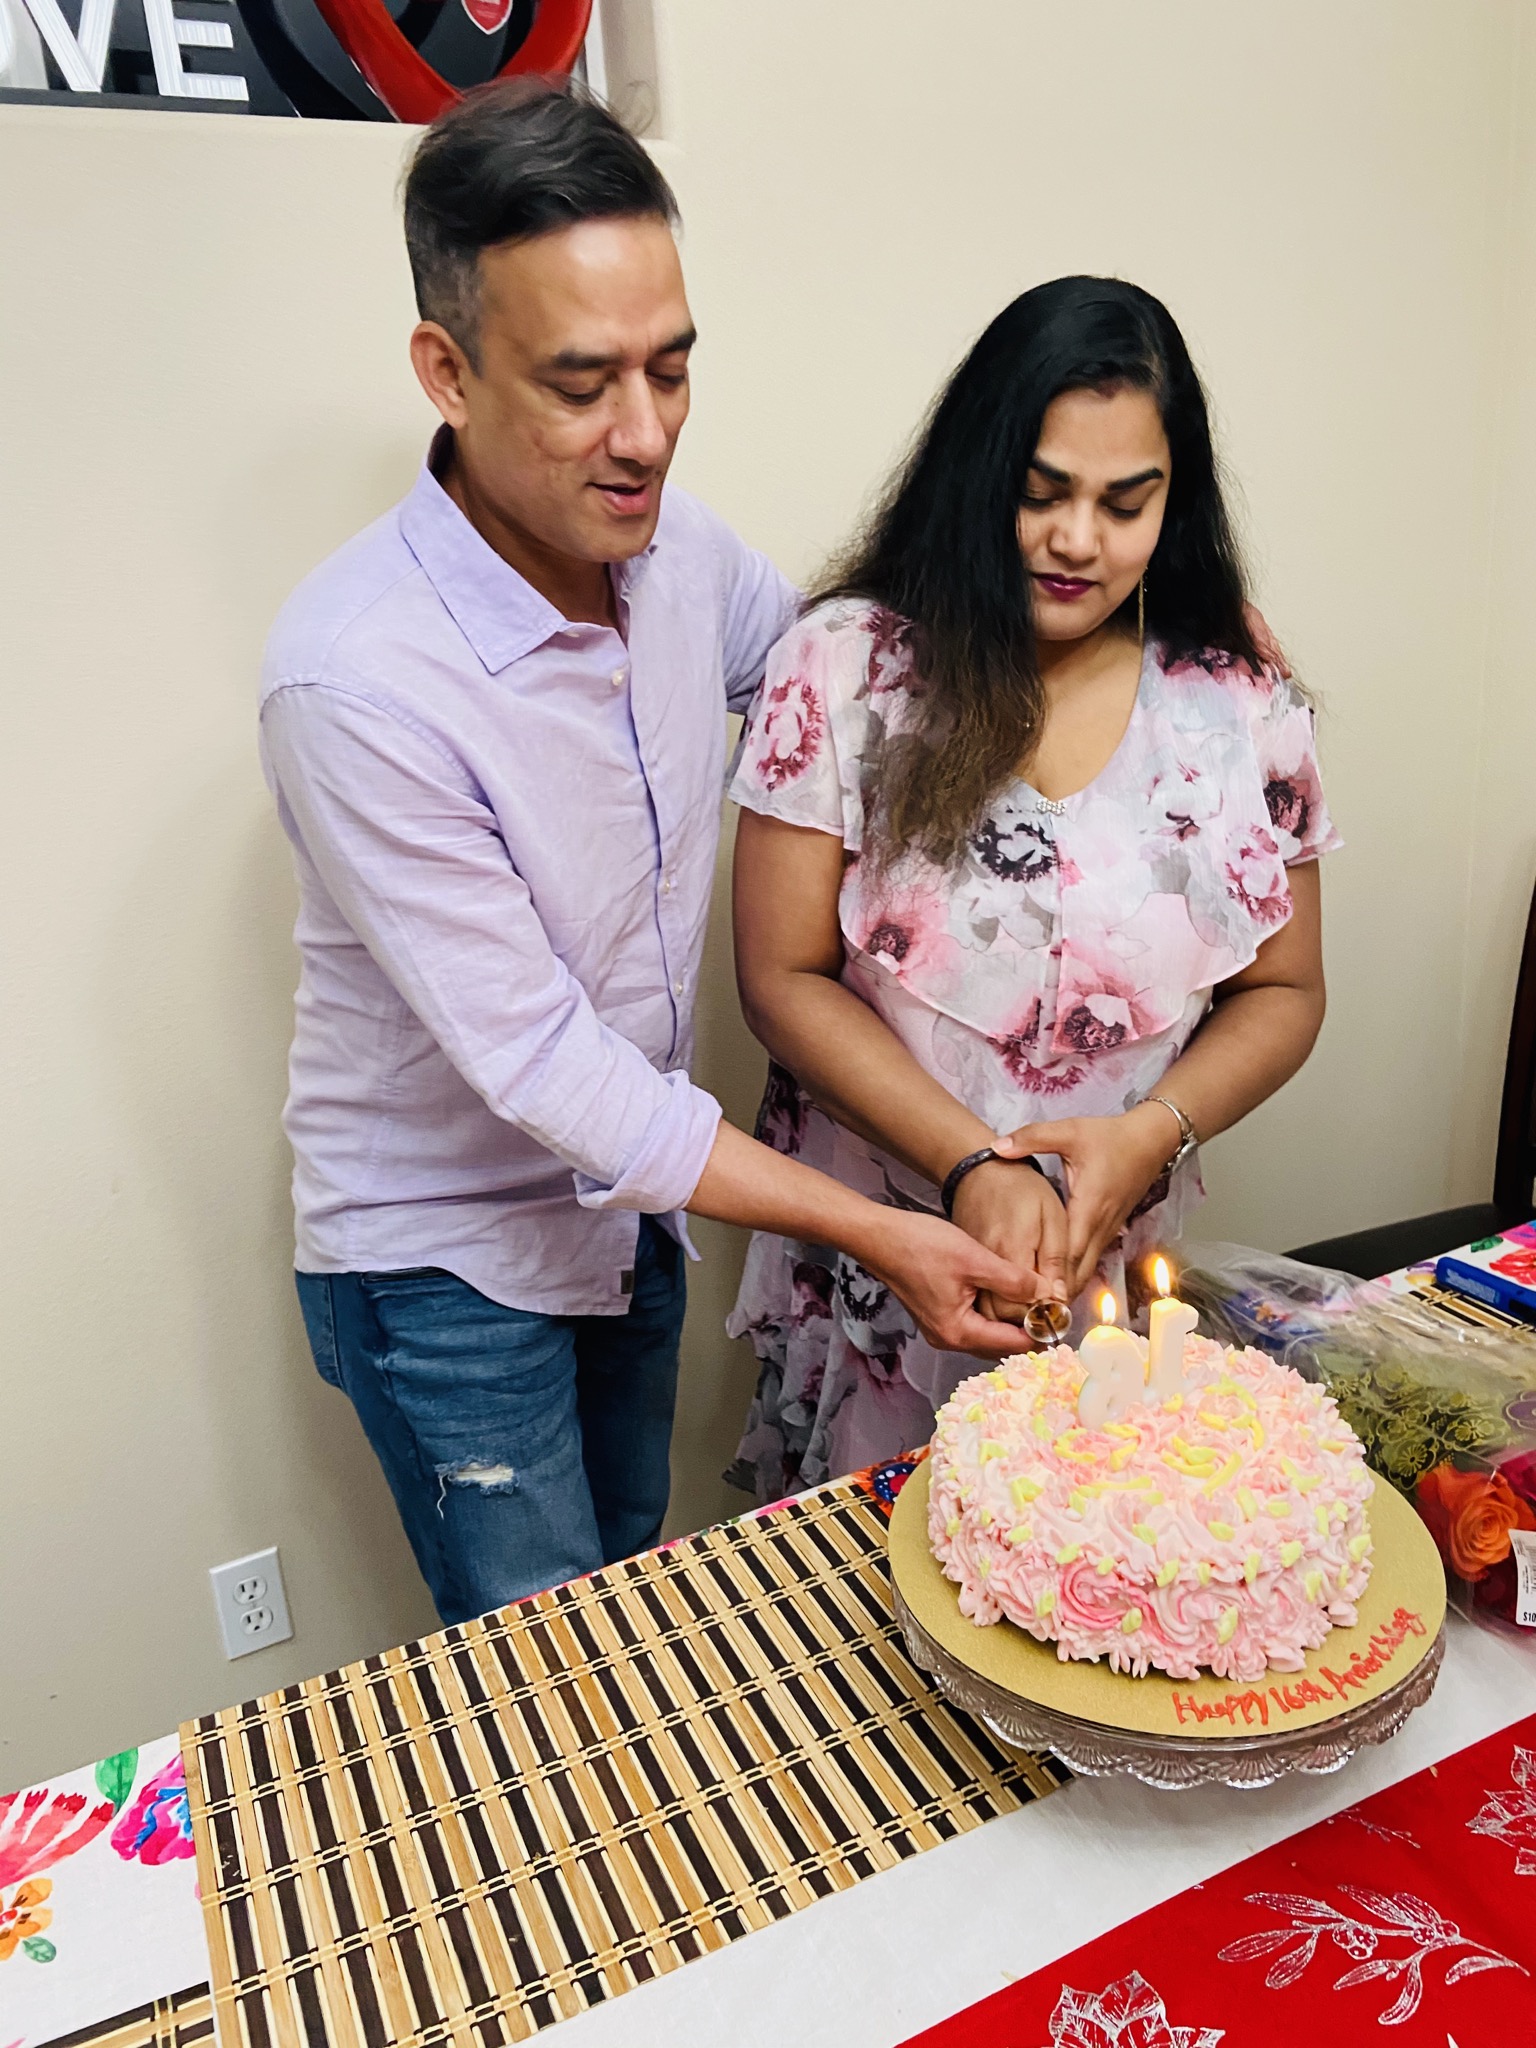
When I bake and frost Pineapple cake with whipped cream Frosting on my husband birthday and he really likes it, with a positive appreciation once again I baked on our 16th Anniversary Cake.do check my Anniversary pix adding at last 📷
Delicious frosting smothered between a soft layer of sponge cake and topped with strawberry pie filling.
Craving more? Subscribe to desiswadbyaayushi to get new recipes and a weekly newsletter delivered straight to your inbox! And stay in touch on Facebook, Twitter, Pinterest and Instagram for all of the latest updates.
Ingredients
1 package chocolate Cake mix
1 tin Strawberry pie filling
Frosting
1(8 ounces) package cream cheese softened
1 cup granulated sugar
2 tsp vanilla
1 1⁄2 cups heavy whipping cream
Method
Preheat oven to 350°. Grease two 9-in. baking pan. In a large bowl, combine cake mix and read instruction behind the box and Follow it. Transfer to prepared pan. Bake 30-35 minutes or until a toothpick inserted in center comes out clean. Cool in pan on a wire rack 20 minutes.
In a bowl whip the 1-1/2 cups whipping cream until stiff peaks form. In another large bowl beat together the cream cheese with sugar and vanilla until smooth. Using a spatula fold in the whipped cream into the cream cheese mixture.
When it cool, cut your cake in two equal half, spread the strawberry pie filling on one, layer covered with whipped cream cheese and Cover with the other cake layer, and cover with cream all over. using star nozzle and leaf tip you can Decorate Then chill And Serve Your Cake and Enjoy.
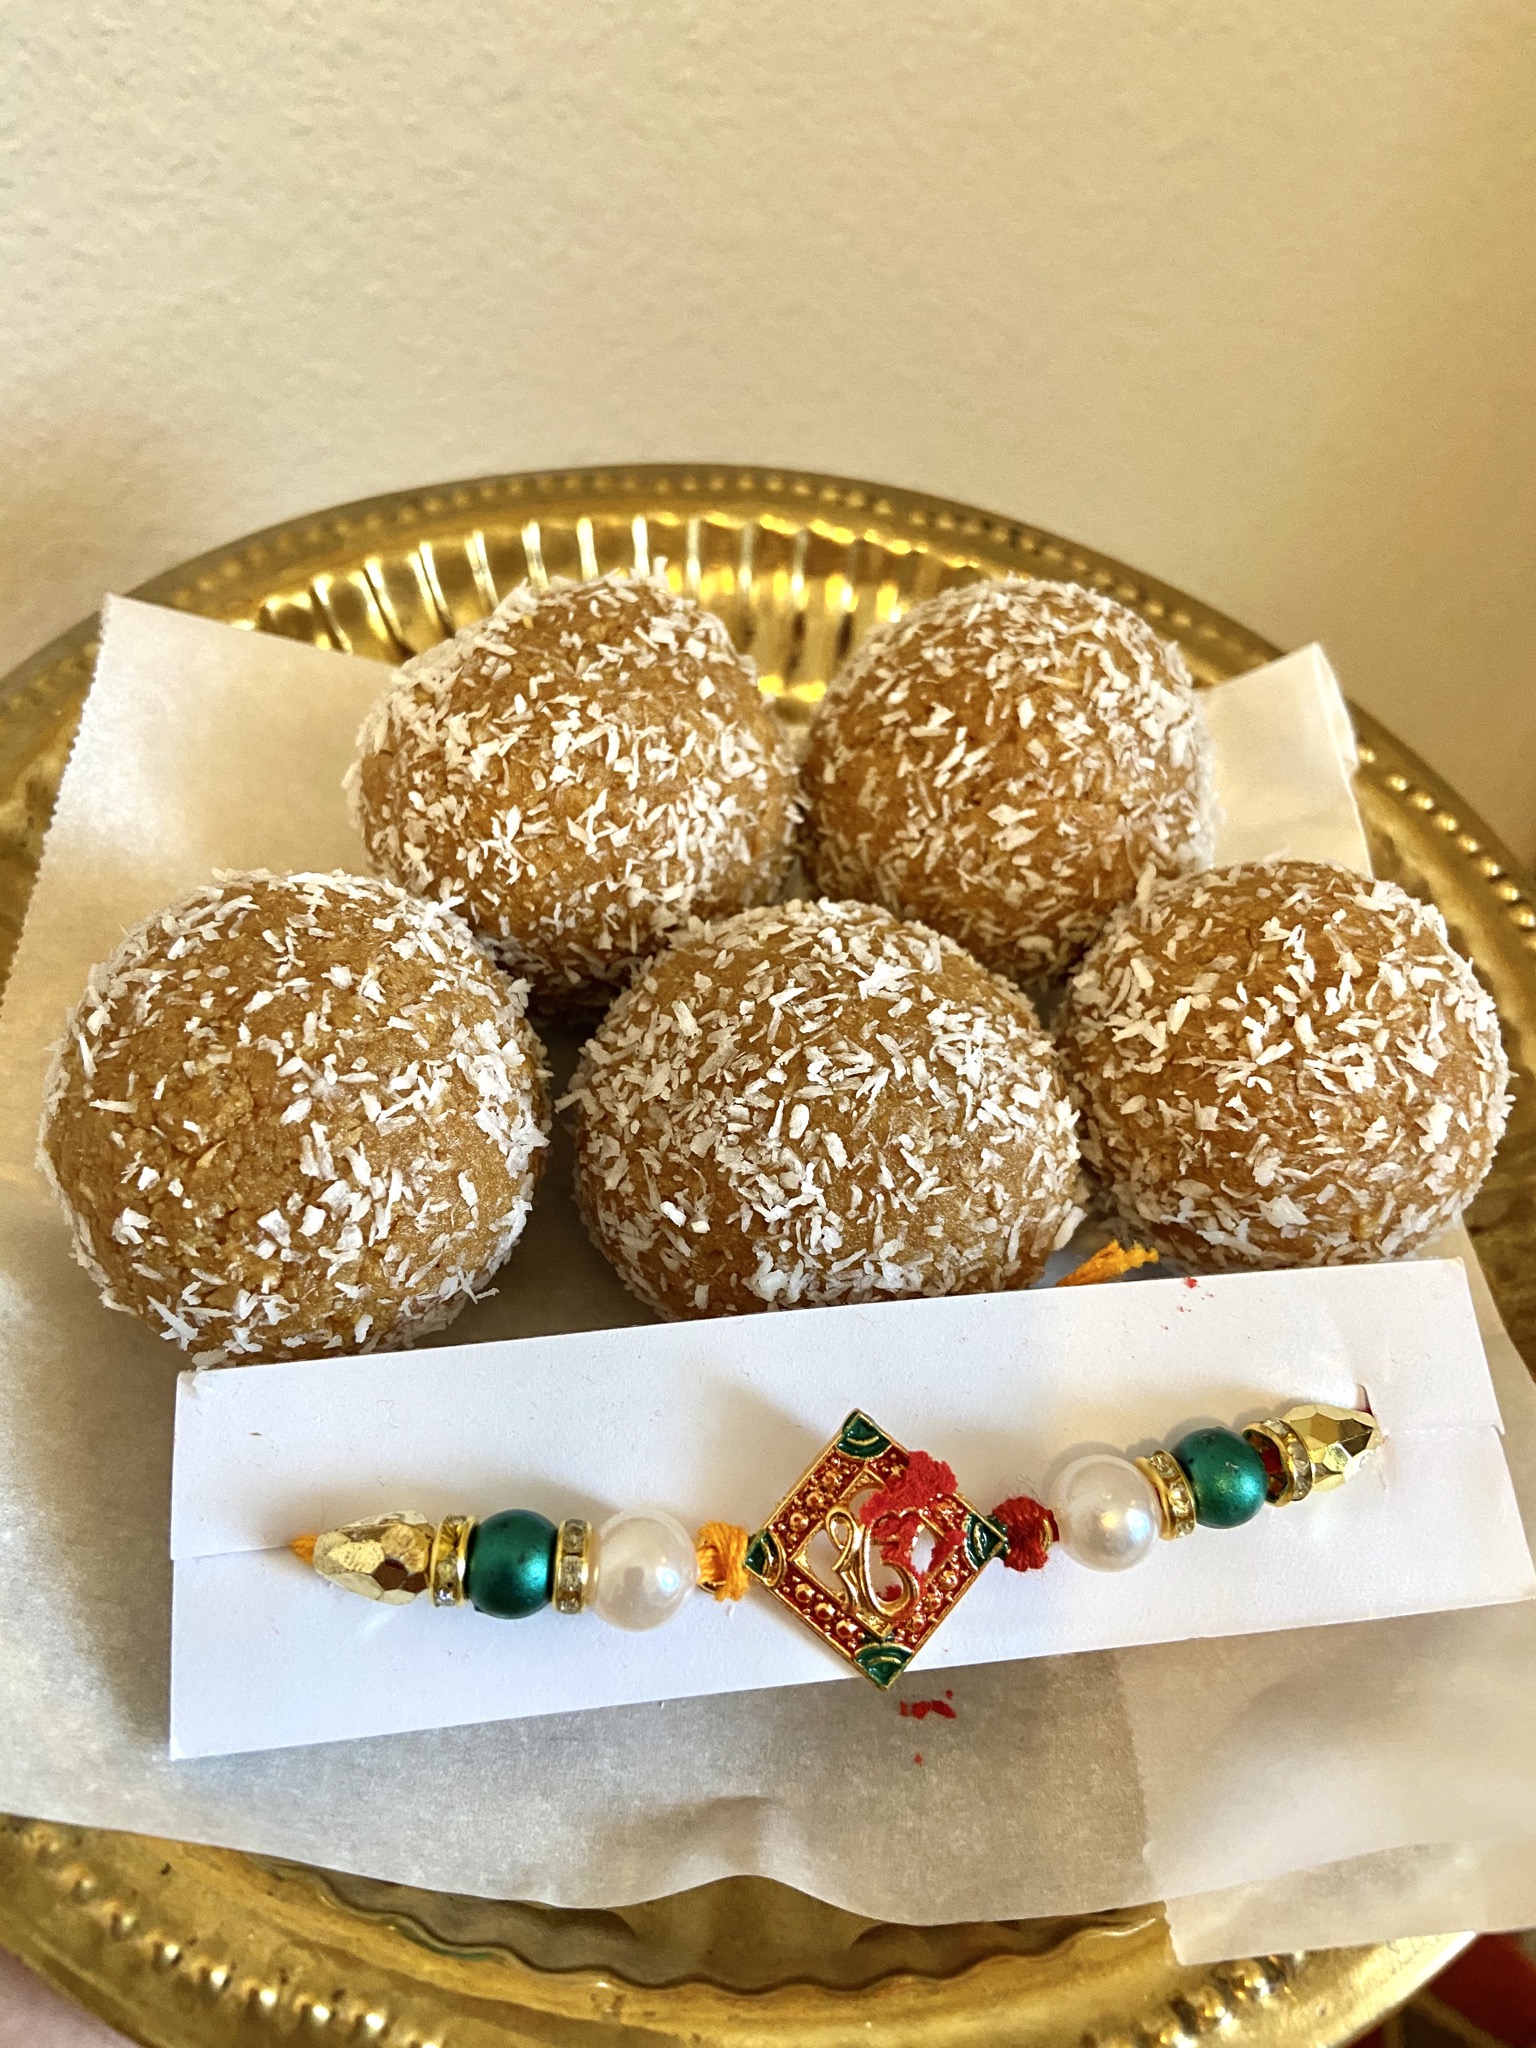
Dulce de Leche (Milk Based caramel ) Laddoo .it’s chewy and caramel flavoured delicious sweet. This irresistibly tasty laddoo’s on this occasion of Raksha Bandhan.
An easy sweet recipe for Celebration made with almond powder, desiccated coconut and Dulche de Leche.
Homemade Brownie Sundaes are a classic dessert that never gets old. Thick fudgy brownies topped with hefty scoops of vanilla ice cream, hot fudge sauce.
My Family craving for this delicious dessert for a long time .so finally baked this one and serve with vanilla ice-cream which is Store bought.
any chocolate lover will love this delicious dessert.check my other chocolate recipe and ice cream
Preheat oven to 350°F (175°C).
beat eggs, sugar and vanilla extract.Blend until smooth, scraping down sides as necessary.
In a large bowl, whisk the flour, cocoa powder and Combine the wet and dry mixtures and fold until a batter forms.
Pour half batter into a greased 13* 9’ inch baking pan and sprinkle chocolate chips and pour another half on top. Bake for 20-30 minutes. Allow to cool and cut in the desired shape.
Tips:- check after 20 mins using a toothpick, as every oven is different.
Adjust sugar as per your own taste buds.
How do you make a brownie sundae,Here is a step by Step .
Let them cool, and cut them into squares.
Pick your sundae dish whatever you like,For brownie sundaes we like a wider dish so we can eat brownie into the bottom.
Put a little dollop of hot fudge in the bottom of the dish. Place the brownie on top. Add a scoop of vanilla ice cream. Cover the ice cream with hot fudge.
I used plain old Smucker’s Hot Fudge here.
Tips :- you can Top with whipped cream, sprinkles, and chopped nuts (optional).
First time on my hubby birthday I prepared cake and frost it .it’s like a birthday gift from my side. he always gives gifts on every occasion. I prepared some sweets or food he likes but this time I just want to Surprise him.and he was astonished.i will add pic at the end 🥰
Ingredients
1 package yellow Cake mix
1 tin Canned pineapple chunks
Maraschino cherries 10-12 (optional)
Toppings
Whipped Cream
1 cup heavy whipping cream
3 tablespoons confectioners’ sugar
1 teaspoon vanilla extract
Preheat oven to 350°. Grease two 9-in. baking pan. In a large bowl, combine cake mix and read instruction behind the box and Follow it. Transfer to prepared pan. Bake 30-35 minutes or until a toothpick inserted in centre comes out clean.Cool in pan on a wire rack 20 minutes.
When it cool, cut your cake in two equal half,spread the pineapple syrup on one, layer with whipped cream and the chopped pineapple. Cover with the other cake layer, sprinkle syrup and cover with cream all over.using star nozzle you can Decorate and with pineapple slices and Maraschino cherries chill And Serve Your Cake and Enjoy.
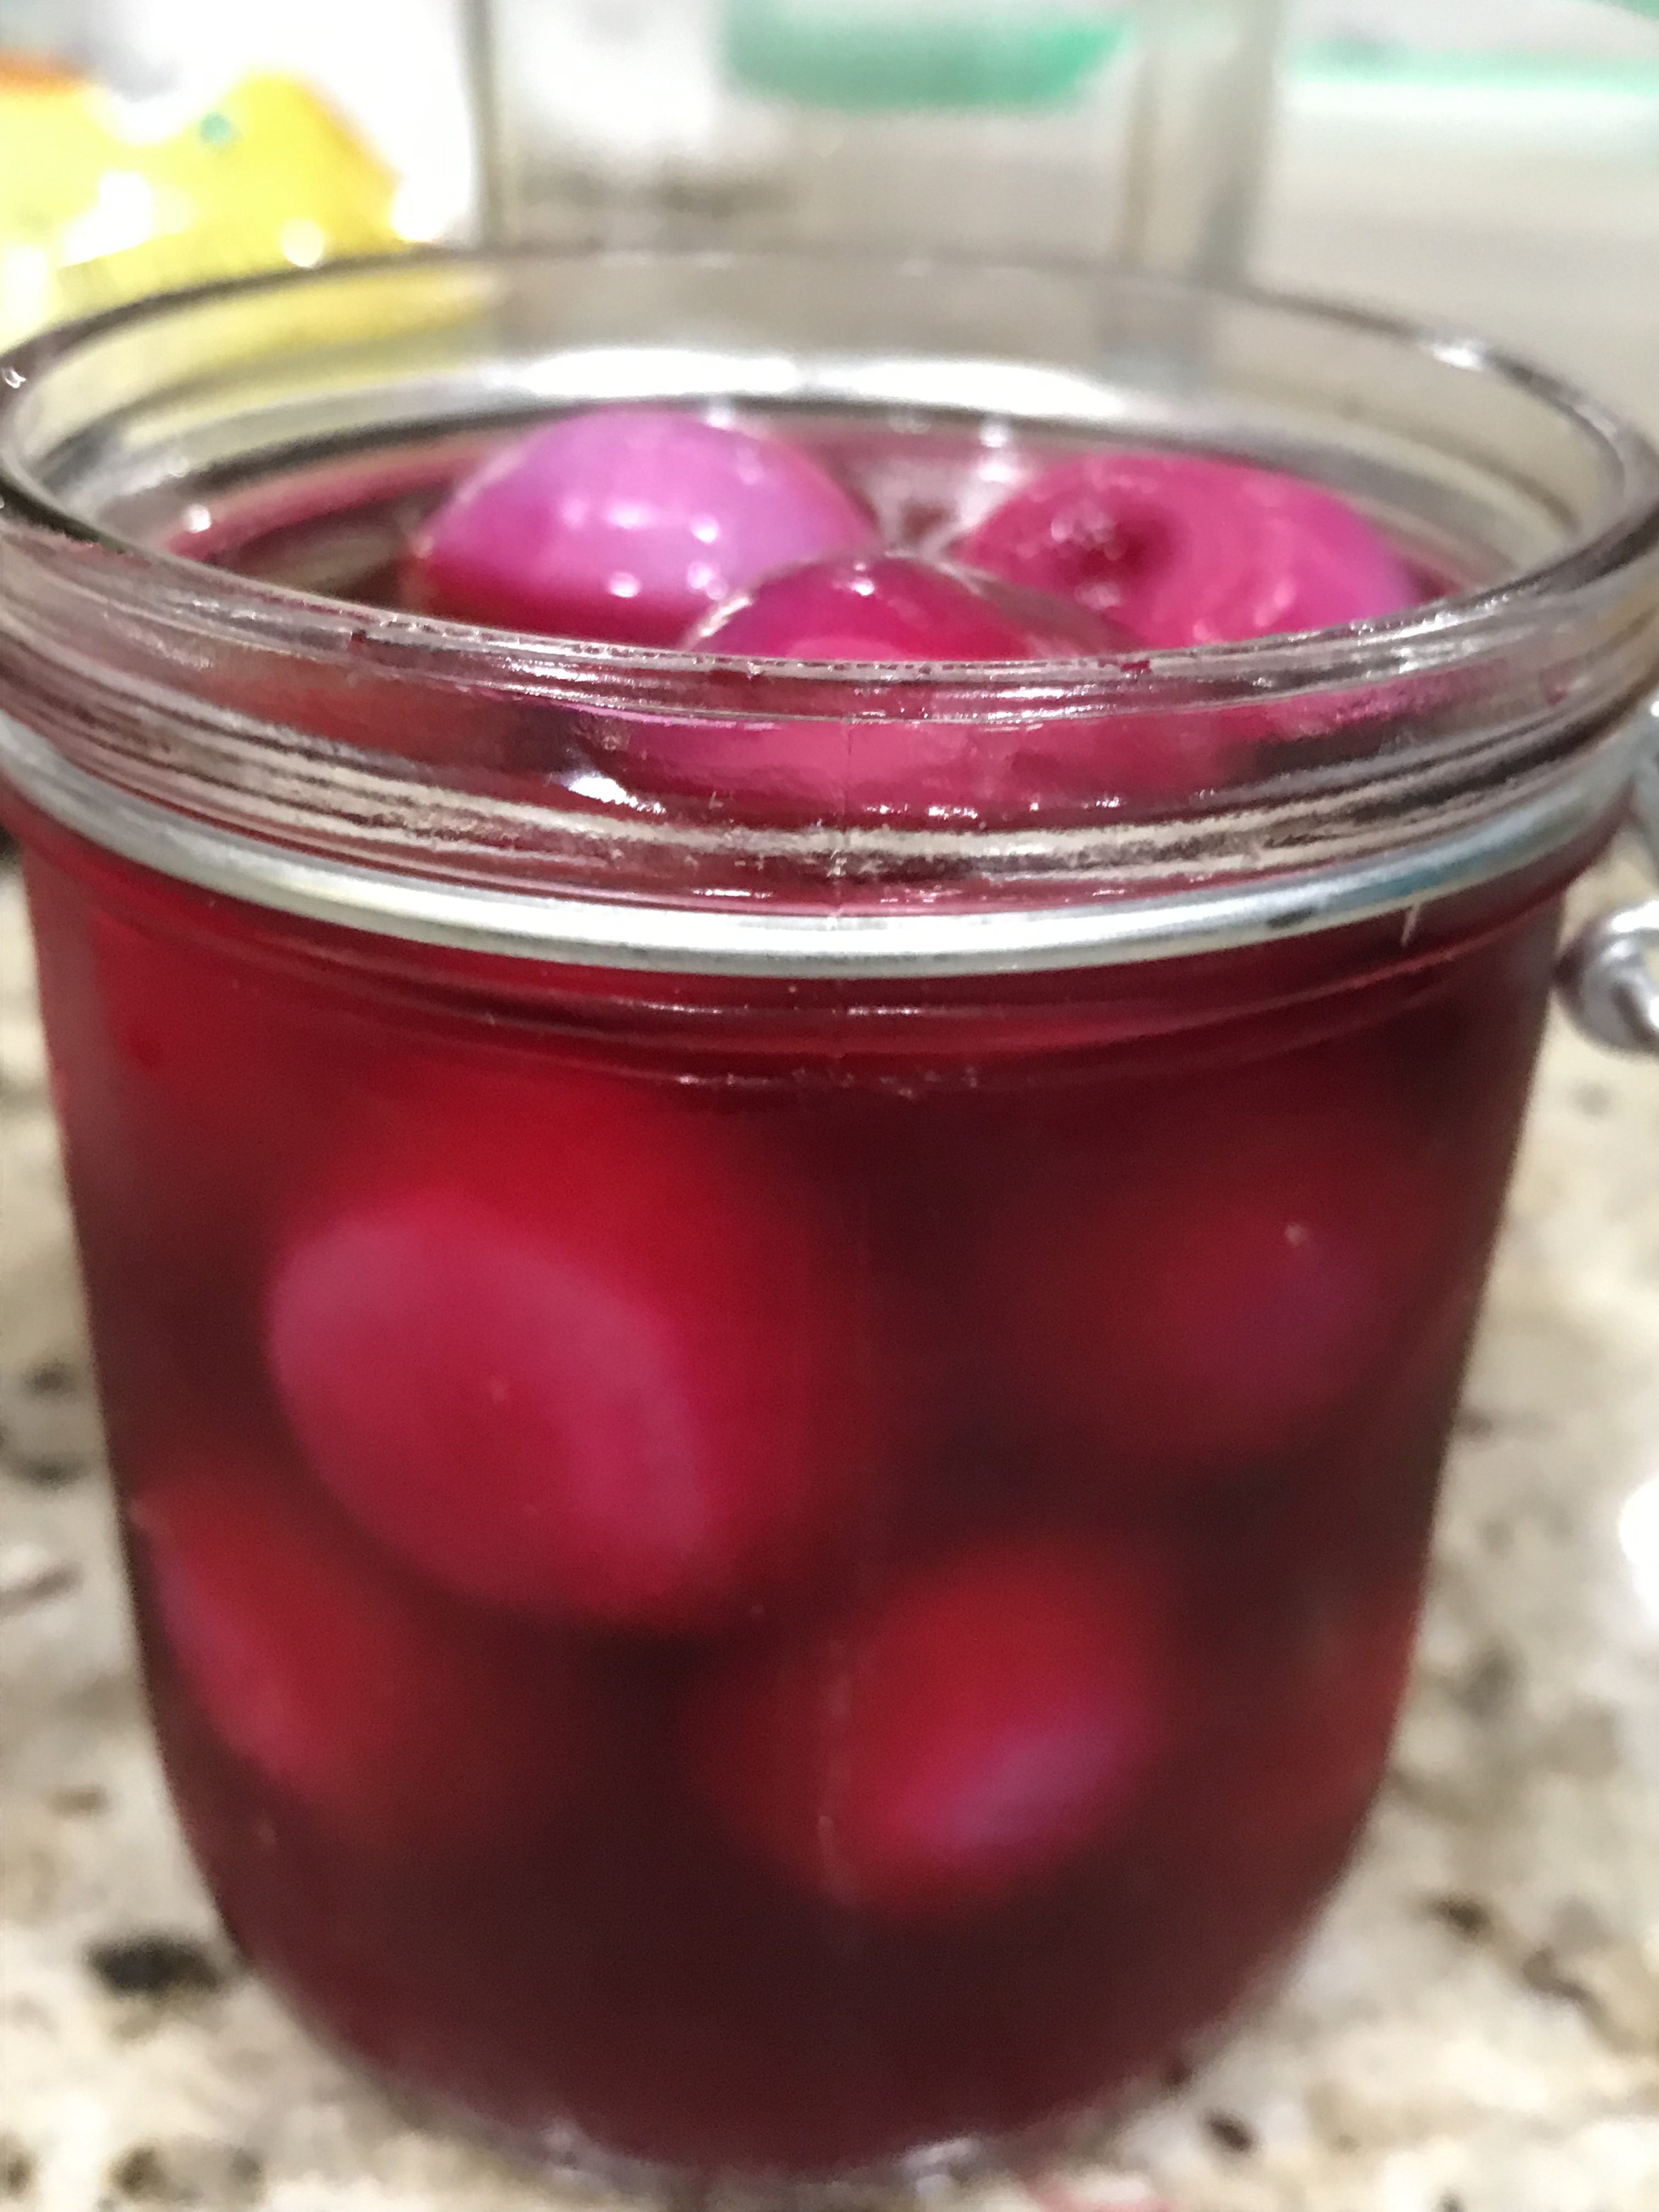
In india it’s called as a Sirke Wale Pyaaz ,
It’s a great accompaniment for any North Indian style meal and are super easy to make at home.
Ingredients
10-15 small Pearl onion or any small size
Water 1/2 Cup
1/4 beetroot
Vinegar or Chilli Vinegar 1 cup
Salt 2 tsp or to taste
Method
Peel and wash onion then pat dry and cut cross mark onion or you can add whole.
Add water in a pan and beetroot ,till it soft not mushy .around 1 minute.Strain water and keep aside
Add the onions in a jar.Pour the water over the onions.Top with vinegar and salt.
Cover the jar and keep it in the refrigerator.Use the onions after 24 hours.
It can be stored for up to 10 days in refrigerator.
Notes
You can skip beetroot but i used as it gives natural pink color to onion.
The vinegar mixture can be used again to pickle the onions.
Just add more onions after the previous ones are finished.
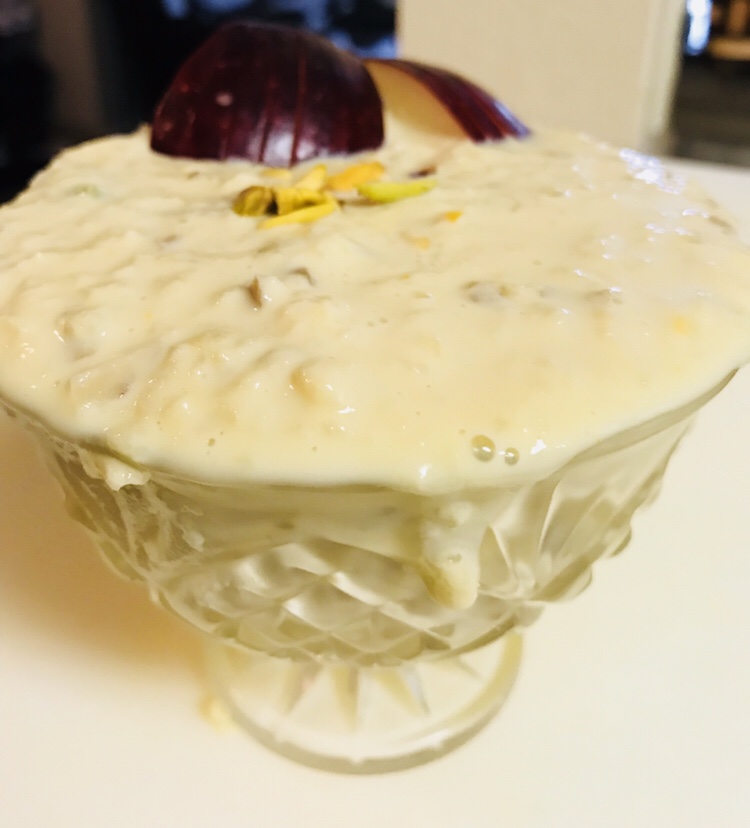
Yesterday it’s my hubby Birthday, he loved the homemade sweet dish and during weekdays we all avoid sweet items and only eat homecooked healthy food, salad, and fruits but he didn’t want to eat especially an Apple.so I thought what special I can prepare which will be healthy and yummy too.So I got an idea to prepare Apple Rabdi which he simply loved it.
It is simply awesome dessert which is healthy yet delicious. Traditionally rabdi is made up by drying up milk in a heavy bottomed pan by heating for several hours. It is very time taking procedure.To lessen the effort it can be made very easily with condensed milk and several other ingredients.
Ingredients
Milk 1 liter
Condensed Milk 1/2 tin or to taste
Apple 3-4 (grated)
Cardamom powder 1/4 tsp
Assorted Dry Fruits 1 tbsp
Few Saffron strands(soaked in 1 tbsp milk)
Clarified Butter 1 Tbsp
Sugar 2 Tsp
Method
In a heavy bottomed pan boil milk & saffron to reduce till 1/4th.meanwhile, take a pan add clarified butter & saute grated apple & adding 2 tsp sugar until apples get cooked. It will take around 5-7 min and juice dried up cooked apples, they become mushy and little bit transparent. Turn off flame and keep aside the pan.
Once milk reduces add grated apple & milkmaid and cook till you get desired consistency.add cardamom powder and assorted nuts turn off flame.keep in a refrigerator to chill.Serving cold or hot is an individual choice but I prefer chilled one.
Tips:- It’s very important to Cook grated apples(peeling is optional) before adding in milk else milk will curdle and you may end up in mess.
Dosa is a kind of crepe made from a fermented batter. Its main ingredients are rice and black gram(urad dal). It is a typical South Indian diet and popular all over the Indian subcontinent. Traditionally, Dosa is served hot along with sambar & chutneys
This traditional South Indian dish usually ate for breakfast or dinner They can either be made plain or stuffed.A Lot of variation of dosa can be prepared using a batter like a masala dosa,Onion dosa, Butter dosa, Masala dosa, Mysore masala dosa.one can check other south Indian delicacies on my blog
Today i am sharing recipe of Mysore Dosa is very different from all the other dosas. It has a soft inside that is coated with Spicy chutney, and is crisp on the outside.
Ingredients for Dosa batter
Black gram (urad dal) 1 cup
Bengal Gram (chana dal) ½ cup
Rice 4 ½ cups
Flattened rice (poha) 1 cup
Salt to taste
Ingredients for Spicy Chutney
Garlic 5-6 cloves
A dash of ginger
Dry Red chillies 4-5
Small onion 1 chopped
Bengal Gram (chana dal)2 tbsp
Salt to taste
Oil 1/2 tsp
Method for preparing chutney
Roast channa dal and red chillies in medium flame with few drops of oil. Add onion, garlic along with and fry for few minutes. Cool down and transfer to the mixer & then Grind it to a thick paste once done add salt & adding a little water for a spreadable consistency.
Method for preparing dosa
Wash & Soak Rice,Bengal gram and Black Gram together.In a separate bowl soak flattened rice .Allow to soak for 7-8 hours or overnight.Rewash the rice by draining the water 2-3 times.Grind to a paste adding flattened rice ,like grains should be felt in the batter or smooth consistency.now take the batter in a large bowl or pan.add salt. mix very well. cover and allow to ferment for 8 to 9 hours or more. time of fermentation will vary depending on the temperature conditions. lightly stir the batter before you begin to make dosa.
Heat the iron griddle or non-stick Tawa well.Pour a spoonful of batter in the center, spread with the back of the spoon to a thin round.Pour a tsp of ghee or oil over and once the dosa is half cooked, then spread a tblsp of red spicy chutney.
Pour oil around the dosa and Cooked well.The dosa may then be folded in half and served or rolled as in a wrap.Remove from Griddle & Serve hot with chutney or sambar.